I’ve helped hundreds of people turn their yards from boring to beautiful without spending a fortune.
You’re probably staring at your outdoor space right now thinking it needs work but you don’t know where to start. Maybe you’re worried it’ll cost too much or take forever.
Here’s the truth: you don’t need a massive budget or a landscaping degree to create a yard you actually want to spend time in.
I’ve spent years designing outdoor spaces that look professional but don’t require professional help. The tricks I use work for small patios and big backyards alike.
This guide walks you through the whole process. We’ll start with planning (the part most people skip and regret later) and work our way to the finishing touches that make everything come together.
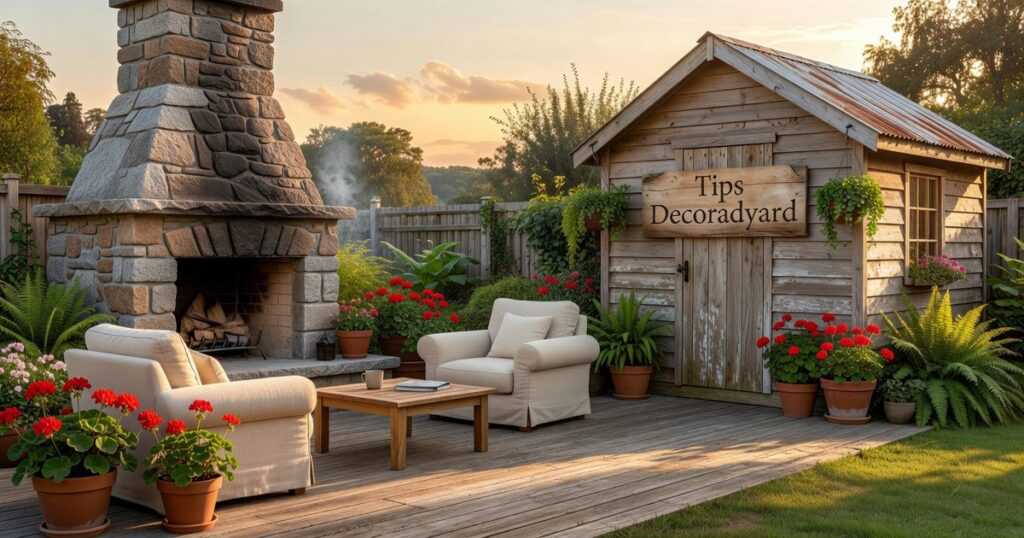
At Decoradyard, we focus on real solutions that work for real people. Not magazine spreads that cost thousands. Not complicated projects that sit half-finished for months.
You’ll learn how to make smart choices about layout, which upgrades give you the most bang for your buck, and how to add style without adding stress.
Your dream yard is closer than you think. Let me show you how to get there.
Step 1: The Foundation – Plan Your Perfect Outdoor Space
Most design articles tell you to start with a mood board.
Pinterest first, planning second.
But I think that’s backwards.
Here’s why. When you lead with pretty pictures, you end up buying things that look good but don’t actually work for how you live. I’ve seen too many yards with beautiful furniture that nobody uses because it’s in the wrong spot or serves the wrong purpose.
Define Your ‘Why’
Before you look at a single product, ask yourself what you actually need this space to do.
Are you trying to create a spot where you can have coffee in the morning? Do you want a place where the kids can burn off energy while you watch from a comfortable chair? Maybe you’re picturing weekend dinners with friends.
(You can want more than one thing, but knowing your priorities matters.)
I know the common advice is that your yard should be “multipurpose” and work for everything. But trying to make one space do ten things usually means it does none of them well.
Assess Your Canvas
Walk your yard at different times of day. I mean actually walk it.
Where does the sun hit at 7am? At noon? At 6pm when you’re home from work?
Note the spots that stay shady. Find the areas that get blasted with afternoon heat. Look for corners that feel naturally private versus the parts where your neighbors can see everything.
Measure your main zones. You don’t need an architect’s precision, but knowing if you have 10 feet or 20 feet to work with changes what you can realistically fit.
At decoradyard, I always say the yard tells you what it wants to be. You just have to pay attention.
Create a Simple Mood Board
Now you can look at inspiration.
But keep it simple. Save five to ten images that feel right. Not fifty. Not a hundred.
What you’re looking for is a pattern. Do you keep gravitating toward clean lines and neutral colors? Or are you drawn to layered textures and warm tones?
Your style might be modern, rustic, coastal, or something in between. The label doesn’t matter as much as having a clear direction so you’re not buying random pieces that don’t go together.
Step 2: Create ‘Rooms’ – Structuring Your Yard for Function and Flow
Most people throw furniture on their patio and call it done.
Then they wonder why nobody actually uses the space.
Here’s what I’ve learned. Your yard needs structure just like your living room does. You wouldn’t put your couch in the middle of nowhere facing a wall, right?
Same rules apply outside.
Start with an outdoor rug. It sounds simple but this one thing changes everything. Drop a rug under your seating area and suddenly it feels like an actual room instead of random chairs on concrete.
I see people make this mistake all the time. They push everything against the house like they’re trying to hide it. Don’t do that.
Pull your furniture together into tight groups instead. You want people sitting close enough to talk without shouting across six feet of empty space. Think about how you’d set up a living room for conversation and copy that outside.
Now here’s something most backyard renovation decoradyard guides won’t tell you.
Planters work better than fences for dividing space. I’m serious. Line up a few large pots between your dining area and your lounge spot. You get a natural border plus you’re adding plants which makes everything look better anyway.
The trick is using different heights. Mix tall planters with shorter ones so it doesn’t look like a wall.
You also need pathways. Not because they’re pretty (though they are). Because they tell people where to walk. I use stepping stones in some spots and gravel in others depending on how much traffic the area gets.
Pro tip: Keep pathways at least three feet wide. Anything narrower feels cramped and people will just walk on your grass instead.
When you connect all your outdoor rooms with clear paths, something cool happens. Your whole yard starts feeling intentional. Like you actually planned it (even if you’re making this up as you go).
The goal isn’t perfection. It’s creating zones that make sense for how you actually live outside.
Step 3: Layer with Life – The Art of Planting
Here’s where most people mess up their yard.
They grab whatever plants look pretty at the nursery and stick them in the ground. Then they wonder why everything looks flat and boring after a few weeks.
I used to do the same thing. Spent money on plants that looked great on the shelf but did nothing for my space.
But there’s a better way to think about planting. And it starts with understanding how professional landscapers actually design outdoor spaces.
Think in Threes: The ‘Thriller, Filler, Spiller’ Method
This is the formula that changed everything for me.
For container gardens, you want three types of plants working together. A tall plant in the center (that’s your thriller). Mounding plants around the middle (your filler). And trailing plants that spill over the edge.
I tested this in my own pots last spring. Used a tall ornamental grass as the thriller, some petunias as filler, and sweet potato vine trailing down. People stopped to ask about it.
The reason it works? Your eye naturally follows the height down to the cascade. It creates movement.
Vary Height and Texture
Now some folks say you should stick with one type of plant for a clean look. They think mixing too many varieties makes your yard look messy.
I disagree.
A yard full of the same height plants looks like a parking lot with greenery. You need contrast to make things interesting.
Mix tall grasses with soft flowers and broad leaves. The different textures catch light differently throughout the day. According to a 2019 study from the University of Washington, gardens with varied plant heights and textures increased property appeal ratings by 34% compared to single-variety plantings.
Go Vertical
This one’s especially important if you’re working with a small space.
Trellises and wall planters pull the eye up. Hanging baskets do the same thing. You get more green without losing floor space (which you probably don’t have much of anyway).
I added a simple trellis to my back fence last year. Planted some climbing jasmine. Now that wall is covered and my yard feels twice as big.
Choose Low-Maintenance Winners
Let me be honest with you.
If you kill every plant you touch, don’t fight it. Work with what actually survives.
Succulents, lavender, and ornamental grasses can handle neglect. They look good even when you forget to water them for a week. I’ve seen lavender survive Texas summers with minimal care.
The tips from decoratoradvice decoration ideas decoradyard that work best are the ones you’ll actually maintain. A simple setup you keep alive beats an elaborate garden that dies in two months.
Start with three plants in one container using the thriller, filler, spiller method. See how it goes. Then build from there.
Step 4: Set the Mood – Lighting and Accessories
String lights changed everything for my backyard.
I’m not exaggerating. One Saturday afternoon I hung a simple strand of cafe-style bulbs over my patio and that night it felt like I was sitting at a restaurant in Austin instead of my yard in Midland.
According to the American Lighting Association, outdoor lighting can increase property value by up to 20%. But honestly? I just know it makes me want to actually use my space after sunset.
Here’s what works.
You need more than one light source. I learned this the hard way after installing just pathway lights and wondering why everything still felt flat.
Solar stake lights work great for walkways (and your electric bill stays the same). Then add a spotlight or two aimed at a tree or the side of your house. That layering makes the whole space feel bigger.
Now some people say outdoor accessories are a waste of money. They argue that pillows and cushions just get dirty and you’ll never use them.
But here’s what they’re missing.
A few weather-resistant pillows and a throw blanket turn a basic bench into somewhere you actually want to sit. I swap mine out when seasons change and it costs maybe $50 total. That’s less than one dinner out.
Every yard needs something that catches your eye. A fire pit. A fountain. Even just one really good planter.
Mine’s a small water feature I found at a decoradyard sale for thirty bucks. It gives people something to look at besides my half-dead grass.
The National Association of Realtors found that 41% of buyers would pay more for a home with outdoor lighting already installed. That’s real money we’re talking about.
You don’t need to spend thousands. Just pick one or two things that make the space feel like yours.
Enjoy Your Personal Outdoor Oasis
Decorating your yard doesn’t have to be complicated.
You now have a clear framework to guide you. Four steps that actually work.
I know the feeling of being overwhelmed can stop you before you start. You look at your yard and don’t know where to begin.
That’s why breaking it down matters.
Plan your space first. Create zones that make sense for how you live. Layer your plants so they look good together. Add ambiance with lighting and those finishing touches.
When you follow this process, you tackle the project with confidence instead of confusion.
Here’s what I want you to do: Start small this weekend. Pick one zone in your yard and apply these tips from decoradyard. Maybe it’s that corner by the fence or the area near your back door.
You don’t need to transform everything at once.
Your outdoor oasis is waiting. You have the steps. Now it’s time to make it happen. Homepage. Backyard Renovation Decoradyard.
 Rendric is the co-founder of Decoradyard.com.co and a design innovator. He leads the creative direction of the platform, integrating engaging visuals, interactive content, and practical home decor solutions that empower readers to elevate their living spaces.